
Part 1
Todays post is a start on the development of the F Class model and how it came about.
As some of you may now my personal layout is based on Pemberton in Western Australia and one of my inspirations for the layout besides living in the nearby town of Manjimup was the bridges on the line south of Pemberton and one inspirational photo for a Rail Heritage WA publication has always stuck with me and it was a long time before I saw the colour version but here it is. A picture of F 42 crossing what appears to be the Warren River Bridge with a timber train heading from Northcliffe to Pemberton.
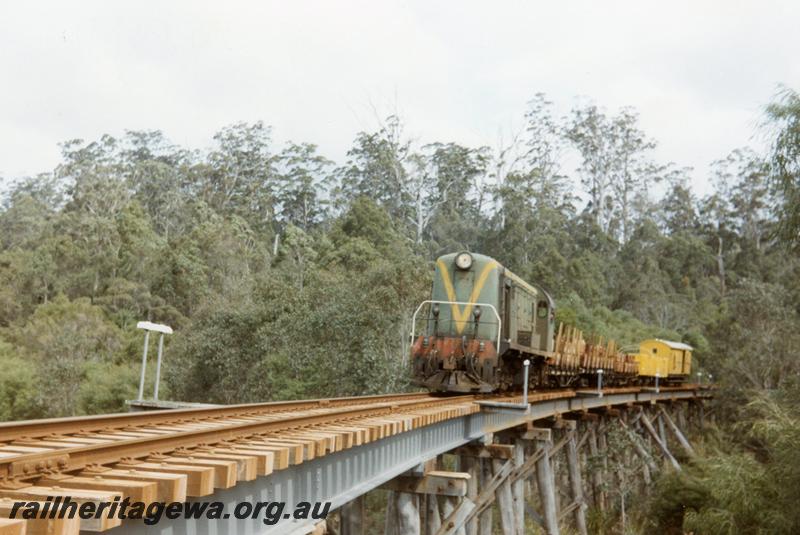
This was my inspiration for choosing to develop my first locomotive kit of the ex Midland Railways F Class.
I began by searching the internet for photos and followed up with visiting the Bassandean Rail Museum to search for plans with the help from Graham Watson. Thankfully the Museum had General Arrangement drawings for the F Class with a side, front and rear view as well as fuel tank and cab layout. I grabbed some photos of the plans as straight on as I could, however I was later able to get the plans scanned thanks to Rob Clark, which provided a much more accurate reference. While at the museum I also took the opportunity to take photos and measurements of F 43 held within the Museum's collection.
At this stage I was planning on developing the kit as a urethane cast body with an etched brass chassis. I didnt have a 3D printer at this stage and instead was planning to use my laser cutter to assist in creating the pattern in combination with some scratch building and shaping. To this end I developed plans for the profile of the hood roof, the hood sides, the nose and cab.
The Hood
I planned to make the roof of the hood with insets to attach the sides and front and designed a profile to achieve this. I used my laser cutter to cut the profiles out of 3mm mdf and glued these together to create the length of the roof. Of course this didnt result in a smooth profile and I had to use putty and sanding to shape a smooth profile. This was stage one complete and I used it to make an intermediate pattern.

For stage two I took a mold and created a urethane casting which i was able to further shape. I had the idea of using my laser cutter to cut the holes for the fan and exhuast and to accurately locate these I created a jig for the laser cutter to locate the pattern accurately.
This technique was successful so I continued to utilise the laser cutter further, cutting a groove to demarcate the inspection plate in front of the fan grill and then cutting grooves for the rails on the hood roof, which i was able to slot evergreen styrene into. I had the idea of using a 0.1mm thick self adhesive signage product to create proud details including bolt details a grill and the exhaust. To do this experimented with the laser cutter settings until I found the sweet spot where the laser was cutting the thin layer without cutting the pattern below.
I stuck down a sheet of the material, cut the design and then carefully peeled off the waste to leave the detail behind.was able to cut the sheet and carefully peel off the waste to leave the detail behind.

Too be continued...................


